Appearance
Custom Cards
Make it easier for your team to fill out structured Miro cards using our app, Custom Cards.
Custom Cards allows you to attach up to 15 custom fields to Miro cards on your board. Each field has a label and it can be required or optional; radio buttons or a container for text.
Installing Custom Cards
- Read and agree with the Terms and Conditions.
- Open Custom Cards on the Miro App Marketplace and tap on the blue Connect button. Follow the prompts to install Custom Cards.
Creating a card template
Open a Miro board and tap on the on the Tools, Media and Integrations (+) icon in the Creation toolbar. Find the Custom Cards icon and tap on it.
This will open a panel that shows a blue Create card template button. Tap on that to begin creating your first card template. The New card template form will appear.
Each row in the form represents a field that will be part of your new card template.
The Field name that you enter will appear on the card creation form next to the Icon you choose, if any. The Field type you select will determine whether this field is a text field, a big text field (also known as a text area), or a radio field on the card creation form.
The Radio option means that this will be a field where the user can select one option out of a list of radio buttons that you define. If you decide to create this type of field then you can enter your list of radio button options beneath the field row.
The Title field type is a special field type that will populate the headline at the top of the card. You can rename it but you cannot delete it or give it an icon. Each card template must have at least one field that is not the Title field type.
Tap on the blue Save button when you are finished defining your new card template.
NOTE
Card templates are not shared between boards yet. Let us know if this is a feature you'd like to see.
Editing a card template
Find the Custom Cards icon and tap on it. A panel will appear listing all of the card templates in your board. Tap on the blue Edit button in the card template you'd like to edit.
This will open the Edit card template form where you can modify the fields of your card template, remove fields, or add new ones.
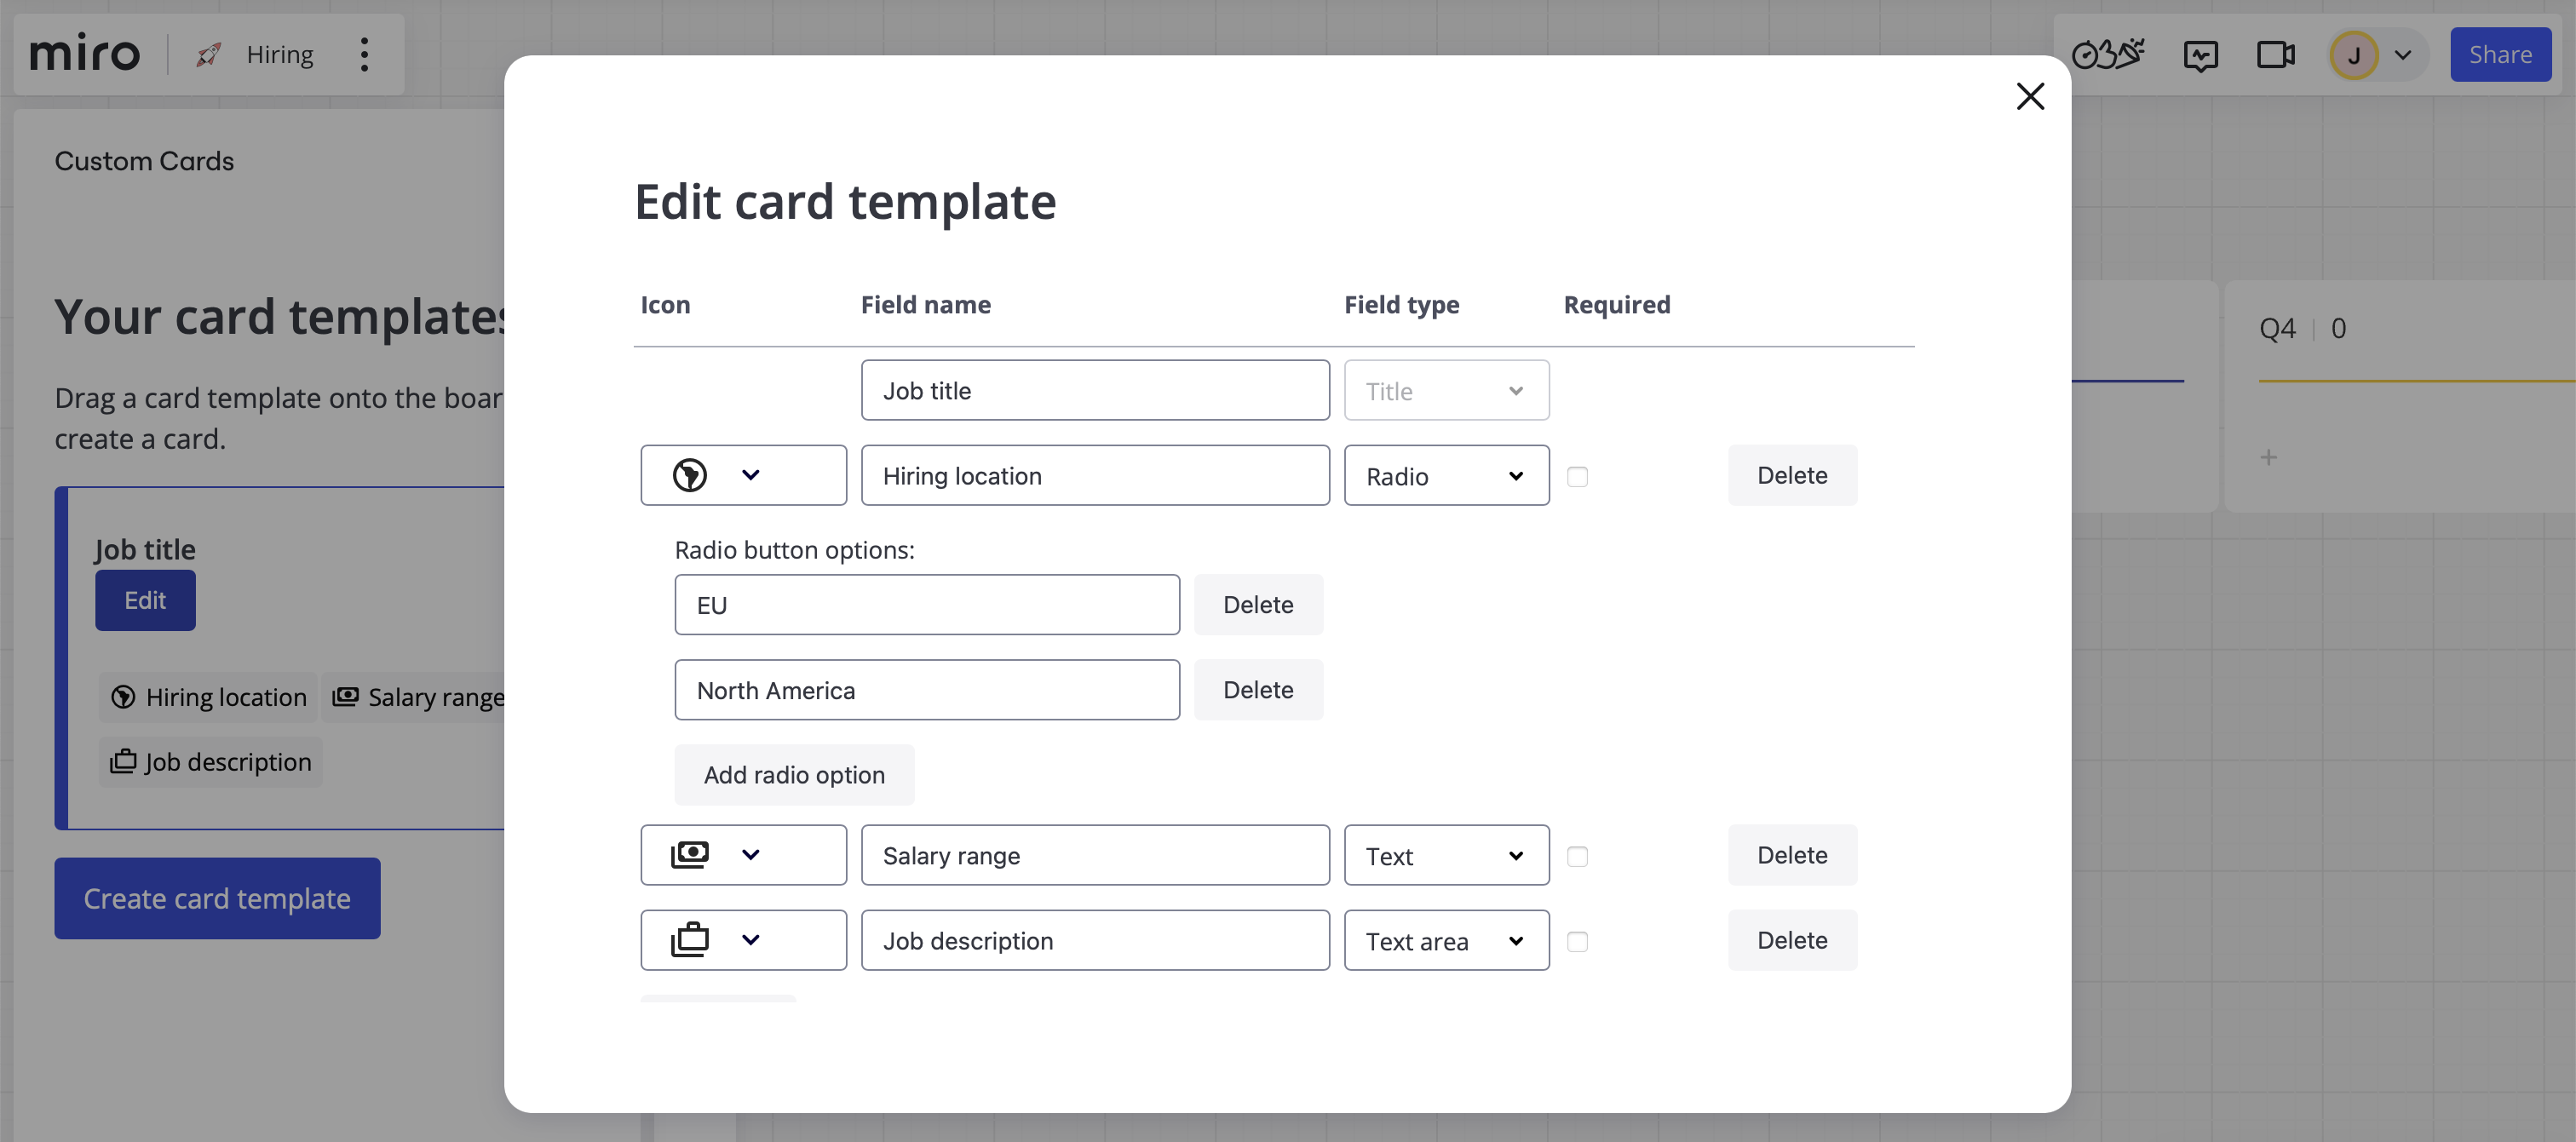
Tap on the blue Save button near the bottom of the form when you're done making changes.
NOTE
Changes to a card template won't affect cards that are already on the board.
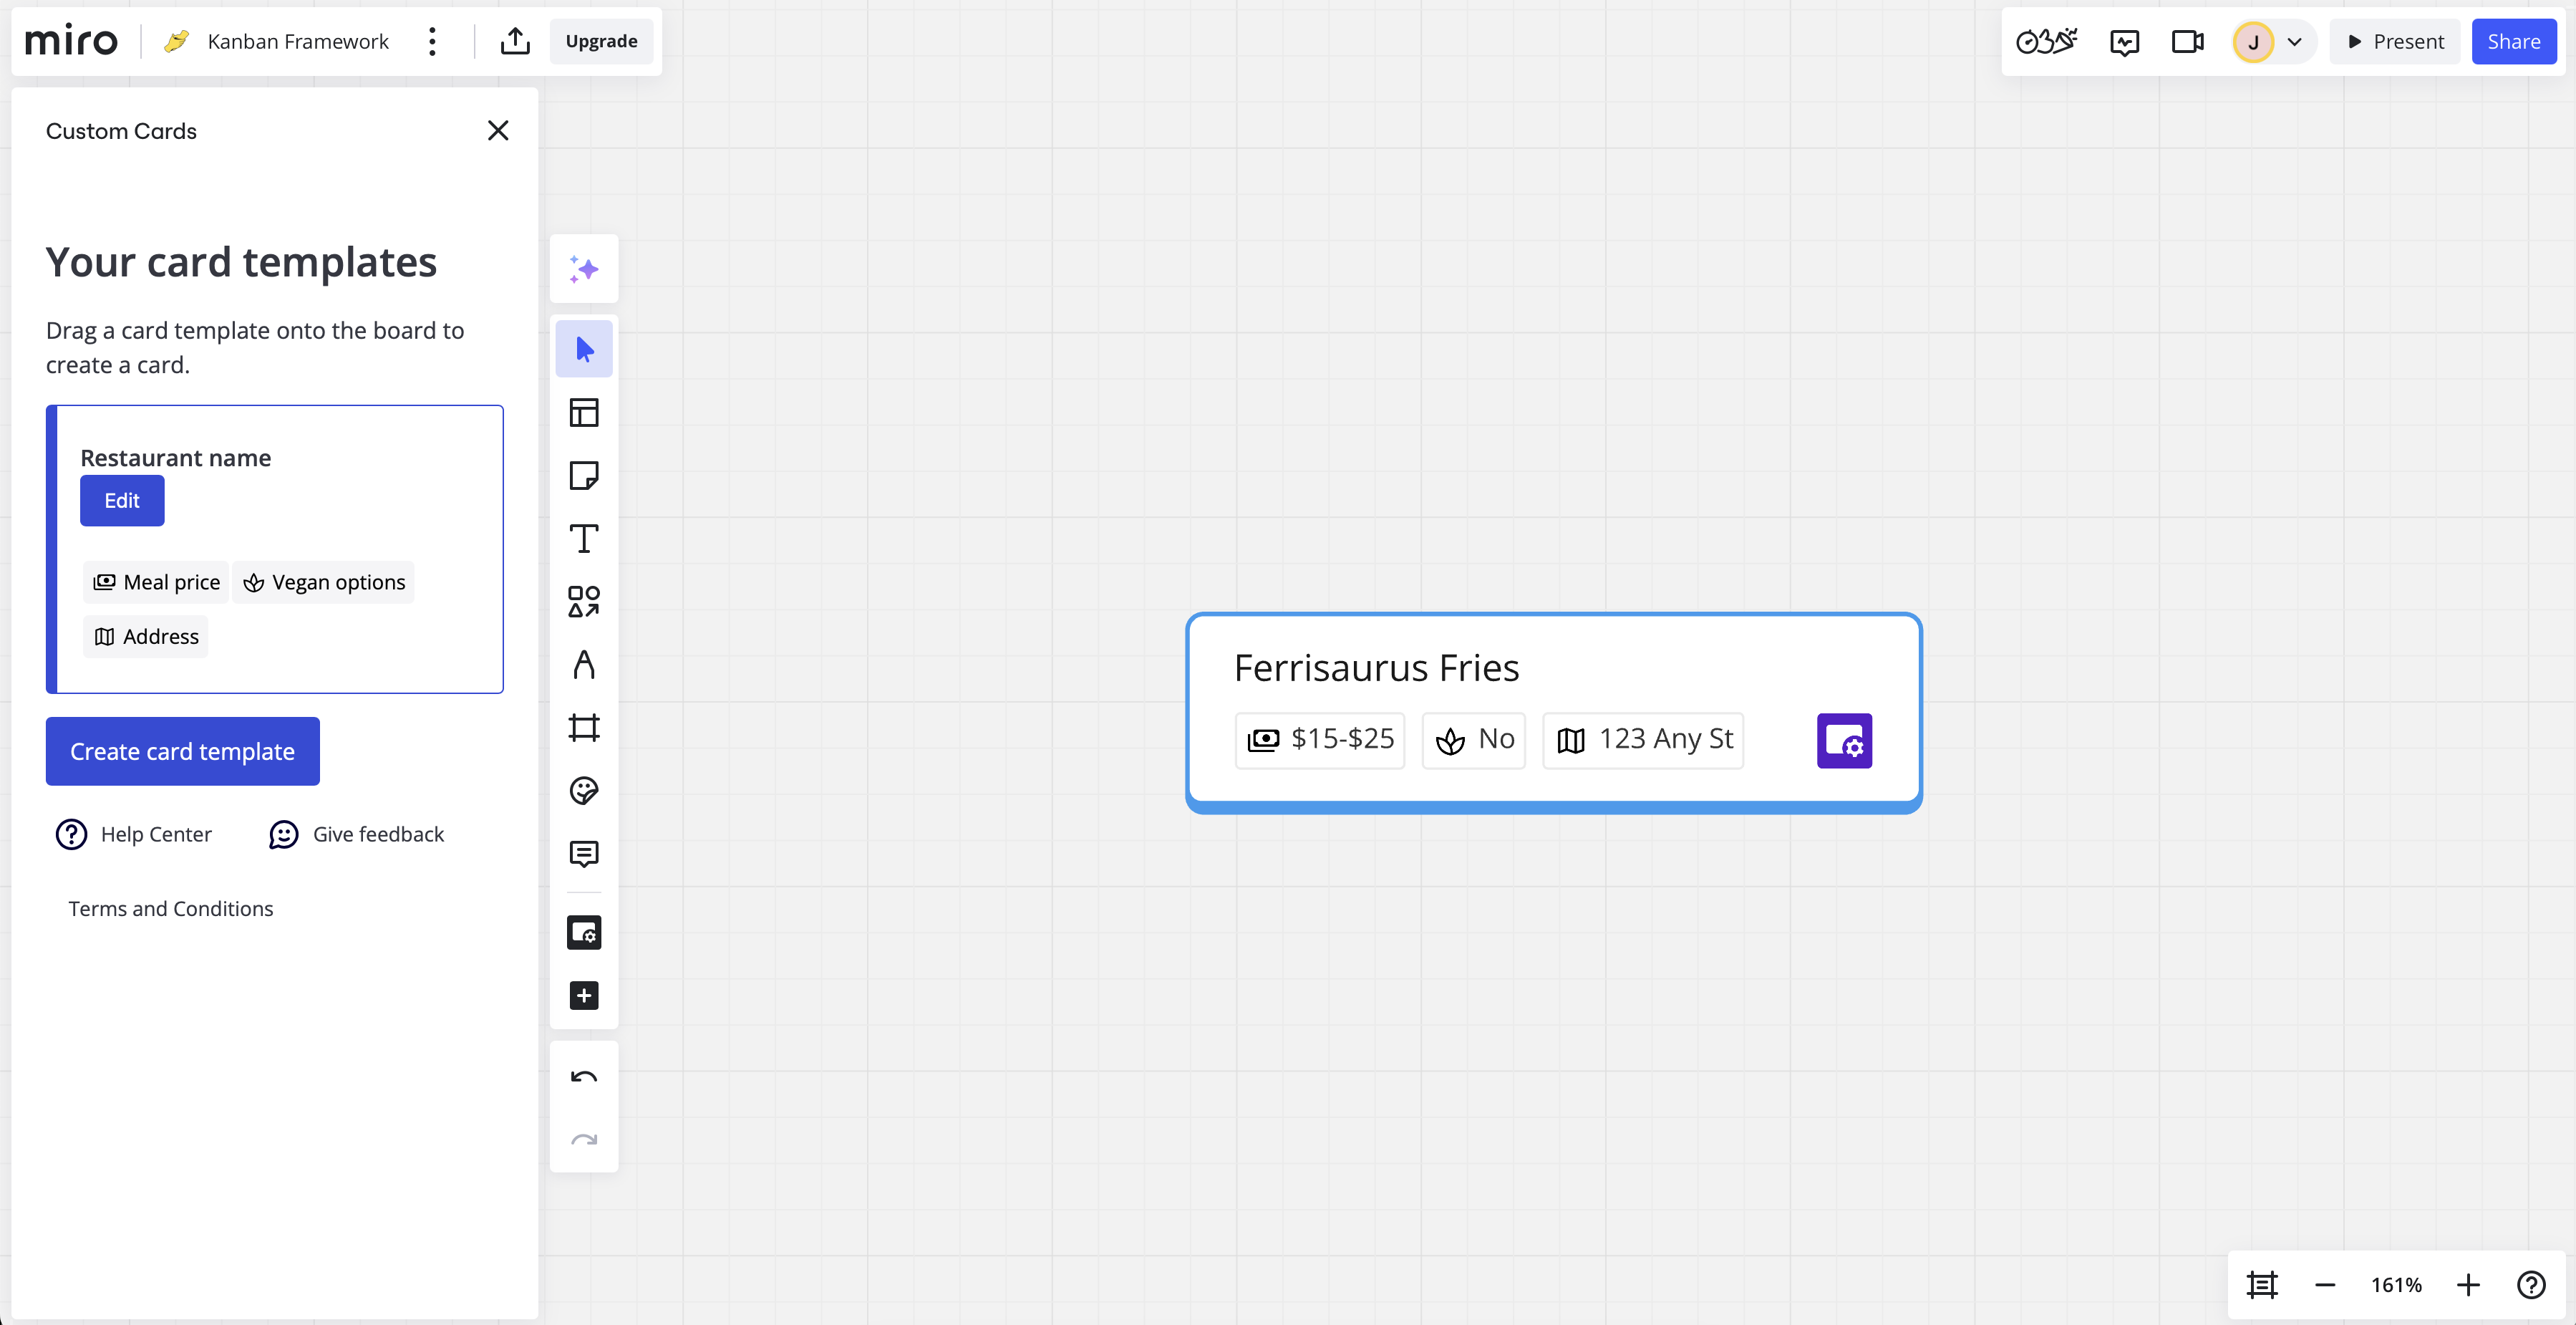
Creating a card
To create a card, open the Custom Cards panel and then click and drag a card template of your choosing onto the board.
You can also select the card template using the tab bar on your keyboard and press Enter to create a card.
If the card template has required fields then the Create card form will open right away. If the card template doesn't have required fields then an empty card will appear on the board. You can fill it out by hovering over the card with your cursor and then tapping on the ![]() icon at the top left corner of the card.
icon at the top left corner of the card.
Fill out the form to populate the card fields and tap on Save when you're done. The card on the board should now show a preview of the values that you've entered into the form.
You can open the card to see longer text values by hovering over the card and tapping on the ![]() icon at the top left corner of the card.
icon at the top left corner of the card.
Getting help
Need help with Custom Cards? Have feedback? Send us a note at [email protected] – we would love to hear from you.